Clear cedar tongue and groove: the very name evokes images of rustic charm and enduring quality. This versatile wood product, prized for its beauty and durability, finds its place in a wide array of applications, from elegant interior walls to sophisticated exterior siding. Understanding its manufacturing process, installation techniques, and long-term maintenance is key to harnessing its full potential. This guide delves into every aspect, providing you with the knowledge to confidently incorporate clear cedar tongue and groove into your next project.
From selecting the right grade to mastering the installation process, we’ll explore the nuances of working with this remarkable material. We’ll compare it to alternatives, discuss its environmental impact, and even offer design inspiration to spark your creativity. Whether you’re a seasoned professional or a DIY enthusiast, this comprehensive resource will equip you with the expertise you need to successfully utilize clear cedar tongue and groove.
Product Overview: Clear Cedar Tongue and Groove
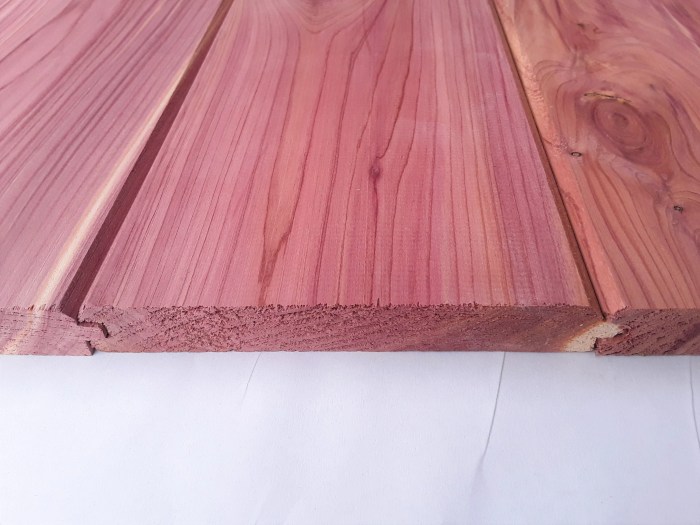
Clear cedar tongue and groove is a popular choice for a variety of interior and exterior applications due to its attractive appearance, natural durability, and ease of installation. This product offers a versatile and aesthetically pleasing option for cladding, roofing, and interior wall paneling.
Manufacturing Process of Clear Cedar Tongue and Groove
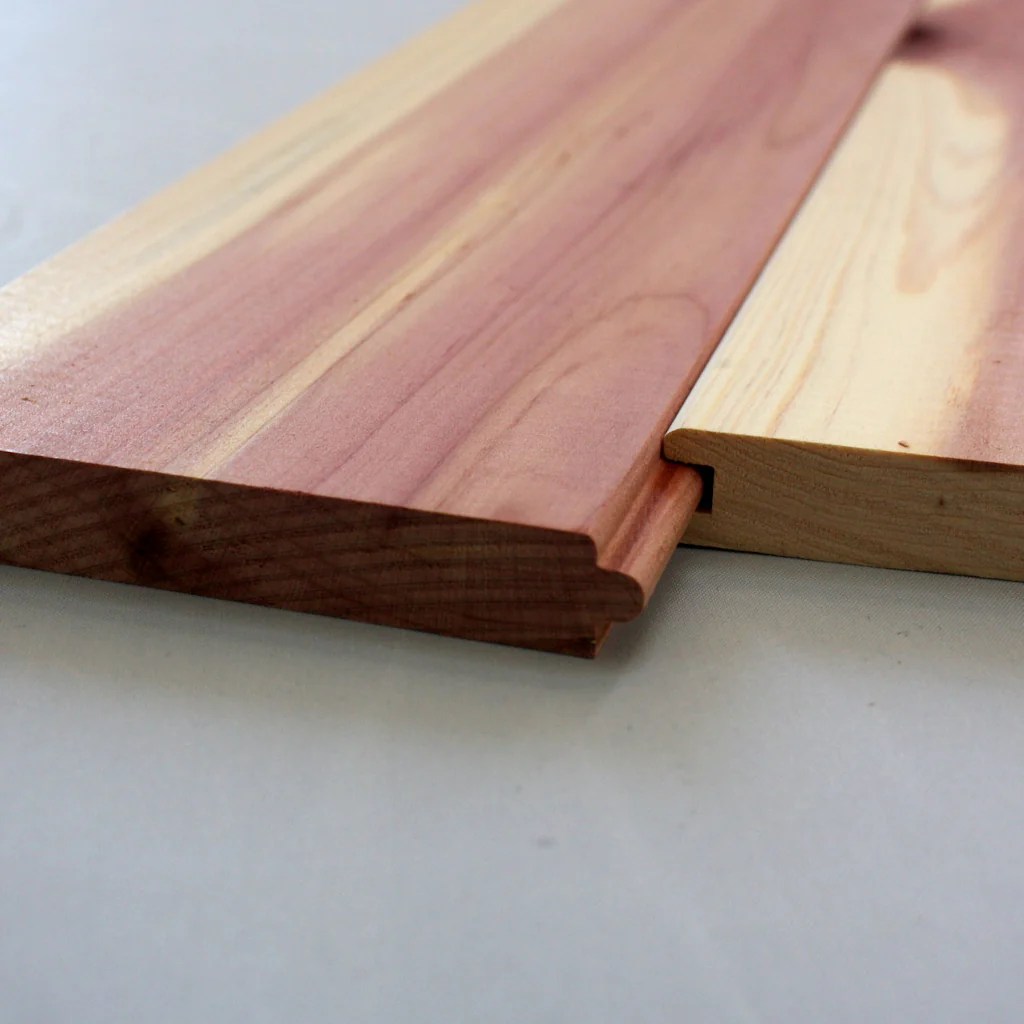
The manufacturing process begins with the selection of high-quality cedar lumber. Logs are debarked and then processed into planks of the desired thickness. These planks are then run through a planer to achieve precise dimensions and a smooth surface. The tongue and groove profile is created using specialized milling equipment, which precisely cuts the interlocking edges. Finally, the boards are graded, sorted, and packaged for distribution. The entire process emphasizes precision to ensure a tight, secure fit between boards during installation, minimizing gaps and maximizing the product’s aesthetic appeal.
Grades of Clear Cedar Tongue and Groove
Several grades of clear cedar tongue and groove are available, each reflecting the level of visual imperfections allowed. Higher grades, such as “Clear,” exhibit minimal knots, blemishes, or color variations, resulting in a uniform and visually appealing surface. Lower grades, such as “Select,” may contain some small knots or minor imperfections, while still maintaining acceptable quality for many applications. The choice of grade depends on the project requirements and the desired aesthetic outcome; higher grades typically command a higher price.
Dimensional Stability of Clear Cedar Tongue and Groove
Cedar is known for its relatively good dimensional stability compared to some softer woods. However, it’s important to note that all wood is susceptible to expansion and contraction with changes in moisture content. Compared to redwood, cedar generally exhibits slightly less dimensional stability. Compared to pressure-treated lumber, cedar’s dimensional stability is generally superior, but requires appropriate acclimation before installation to minimize potential issues. Proper sealing and finishing can further enhance the dimensional stability of cedar tongue and groove.
Common Uses of Clear Cedar Tongue and Groove
Clear cedar tongue and groove finds extensive use in various applications. It is frequently used for interior wall paneling, creating a warm and rustic ambiance in homes and commercial spaces. Exterior applications include siding, creating a visually appealing and durable exterior finish. It is also a popular choice for ceilings, offering a natural and textured aesthetic. In addition, its natural resistance to rot and decay makes it suitable for applications such as decking, though other treated lumber may be preferable for longer lifespan in high-moisture environments.
Cost Comparison with Alternative Materials
| Material | Cost per square foot (USD – estimate) | Pros | Cons |
|---|---|---|---|
| Clear Cedar Tongue and Groove | $4 – $8 | Aesthetically pleasing, naturally durable, relatively easy to install | Can be more expensive than alternatives, susceptible to moisture changes |
| Pine Tongue and Groove | $2 – $5 | Less expensive, readily available | Less durable than cedar, may require more frequent maintenance |
| Vinyl Siding | $3 – $7 | Low maintenance, durable, resistant to moisture | Less aesthetically pleasing than wood, can be damaged by impact |
| Engineered Wood | $2 – $6 | Consistent quality, dimensional stability | May not have the same aesthetic appeal as natural wood |
Installation and Techniques
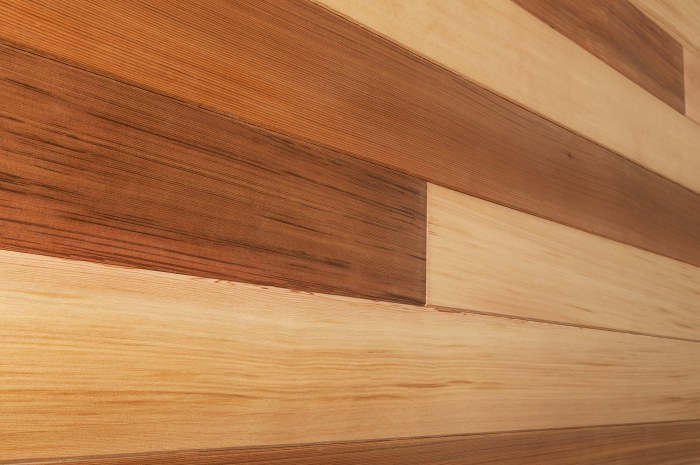
Installing clear cedar tongue and groove requires careful planning and execution to ensure a beautiful and long-lasting finish. Proper preparation and attention to detail are crucial for a successful installation, minimizing issues and maximizing the aesthetic appeal of the finished product. This section Artikels best practices, necessary tools and materials, fastening methods, common challenges, and a step-by-step guide for wall installation.
Tools and Materials
A successful installation hinges on having the right tools and materials readily available. Insufficient preparation can lead to delays and potentially compromise the quality of the finished work. The following list provides a comprehensive overview of what you’ll need.
- Clear cedar tongue and groove planks: Calculate the required quantity based on the area to be covered, adding extra for waste and potential damage.
- Measuring tape: Accurate measurements are fundamental for precise cutting and material estimation.
- Circular saw or miter saw: For accurate cutting of planks to size, particularly for corners and around obstacles.
- Safety glasses and hearing protection: Essential for personal safety during cutting and installation.
- Hammer or pneumatic nailer: For securing the planks, depending on the chosen fastening method.
- Finishing nails or staples: Choose appropriate fasteners for the wood type and thickness.
- Wood glue: Enhances the bond between planks, contributing to a more secure and durable installation.
- Level: Ensures planks are installed straight and prevents uneven surfaces.
- Clamps: Hold planks in place while the adhesive sets, maintaining alignment and preventing warping.
- Putty knife and wood filler: For filling nail holes and minor imperfections.
- Sandpaper: Smooths surfaces after filling and prepares for finishing.
Fastening Methods
Several methods exist for fastening clear cedar tongue and groove, each with its own advantages and disadvantages. The choice depends on factors like the application (wall, ceiling), the desired finish, and personal preference.
- Nail Gun: Offers speed and efficiency, particularly for large areas. Careful attention must be paid to avoid splitting the wood. Countersinking nails and filling the holes is crucial for a smooth finish.
- Hand-nailing: A more traditional method, allowing for greater control and precision. It is slower but suitable for smaller projects or areas requiring more delicate handling.
- Secret nailing: Involves driving nails at an angle into the tongue, concealing the fasteners for a cleaner aesthetic. This requires skill and precision.
Installation Challenges and Solutions
Various challenges can arise during installation. Foresight and preparation can minimize these problems.
- Uneven Walls: Shimming the wall before installation with thin wood shims can correct minor imperfections. For more significant unevenness, consider furring strips to create a level surface.
- Wood Movement: Allow for expansion and contraction of the wood due to changes in humidity and temperature. Leave small gaps between the planks and the walls.
- Plank Splitting: Use the correct size nails and avoid driving them too close to the edges. Pre-drilling pilot holes can also prevent splitting, particularly with hardwoods.
Step-by-Step Wall Installation Guide
Following a systematic approach is key to a successful installation. This guide provides a clear sequence of steps.
- Preparation: Ensure the wall is clean, dry, and level. Address any significant imperfections.
- Layout: Plan the arrangement of planks, considering the direction of the grain and minimizing waste.
- First Row: Install the first row, ensuring it is level and straight. Use shims as needed.
- Subsequent Rows: Install subsequent rows, interlocking the tongue and groove. Use a level to check alignment regularly.
- Fastening: Secure each plank using the chosen fastening method. Countersink nails and fill holes.
- Finishing: Sand the surface smooth, and apply a suitable finish (stain, paint, sealant) to protect the wood and enhance its appearance.
Maintenance and Care
Proper maintenance is crucial for extending the lifespan and preserving the beauty of clear cedar tongue and groove. Regular cleaning, protection from the elements, and prompt attention to damage will ensure your investment remains attractive and functional for years to come. Neglecting maintenance can lead to premature weathering, decay, and costly repairs.
Cleaning Clear Cedar Tongue and Groove
Regular cleaning removes dirt, debris, and mildew, preventing damage and maintaining the natural beauty of the cedar. For routine cleaning, a simple solution of mild soap and water applied with a soft brush or sponge is usually sufficient. Rinse thoroughly with clean water and allow to air dry completely. For more stubborn stains or mildew, a solution of bleach and water (always follow the manufacturer’s instructions for dilution) can be effective, but test it in an inconspicuous area first to ensure it doesn’t damage the finish. Always avoid using harsh chemicals or abrasive cleaners, which can scratch or damage the surface. Power washing should be avoided as it can damage the wood’s surface.
Protecting Clear Cedar Tongue and Groove
Protecting your cedar tongue and groove from the elements is vital. Regular application of a high-quality, UV-resistant wood sealant or stain will significantly extend its lifespan. These protectants prevent moisture absorption, reducing the risk of rot and warping. Reapplication is typically necessary every 1-3 years, depending on the product used and the climate. The frequency of application should be increased in harsher weather conditions. Consider using a penetrating oil-based sealant for maximum protection, allowing the wood to breathe while still providing a protective barrier.
Impact of Weather Conditions
Exposure to various weather conditions significantly impacts the longevity of clear cedar tongue and groove. Prolonged exposure to direct sunlight can cause fading and cracking. Excessive moisture, whether from rain, snow, or high humidity, can lead to warping, swelling, and rot. Extreme temperature fluctuations can also cause stress on the wood, resulting in cracking or splitting. Therefore, proper protection with sealants and appropriate overhangs or shading are crucial to mitigating these effects. For example, in coastal regions with high salinity, a marine-grade sealant should be considered to protect against salt damage.
Signs of Damage and Repair Methods
Early detection of damage is key to preventing further deterioration. Signs of damage include discoloration, cracking, warping, rot, and insect infestation. Minor cracks can often be repaired with wood filler, matched to the color of the cedar. More significant damage, such as rot or insect infestation, may require replacing affected sections. Before replacing any sections, it is important to determine the cause of the damage and address it to prevent recurrence. For example, if rot is discovered, it is crucial to identify and fix any sources of persistent moisture. Replacing damaged sections should be done carefully, ensuring proper alignment and sealing to prevent further water intrusion.
Preventative Maintenance Schedule
A regular preventative maintenance schedule will significantly prolong the life of your clear cedar tongue and groove. Here’s a suggested plan:
- Annual Inspection: Thoroughly inspect all surfaces for signs of damage, such as cracks, warping, discoloration, or insect infestation.
- Spring Cleaning: Clean the surface with a mild soap and water solution, paying close attention to areas prone to mildew buildup.
- Every 2-3 Years: Reapply a high-quality, UV-resistant wood sealant or stain to protect against the elements.
- As Needed Repairs: Address any minor damage promptly, such as filling small cracks or repairing loose boards.
Design and Aesthetics
Clear cedar tongue and groove offers a unique blend of natural beauty and versatility, making it a highly sought-after material for diverse design applications. Its inherent qualities, such as the rich grain patterns and warm tones, contribute to a range of aesthetic outcomes, depending on the design context and desired ambiance. Understanding these aesthetic possibilities is key to leveraging the full potential of this material.
Interior Design Applications of Clear Cedar Tongue and Groove
Clear cedar tongue and groove finds application in a wide array of interior spaces. Its natural warmth makes it ideal for creating cozy and inviting atmospheres in bedrooms and living rooms. It can also be used to add a touch of rustic elegance to dining areas and kitchens, or to provide a sophisticated backdrop in home offices and libraries. Furthermore, its durability and moisture resistance make it suitable for bathrooms and mudrooms, provided appropriate sealing is applied. The adaptability of clear cedar extends to its use in accent walls, creating visual interest and defining different zones within a larger space.
Aesthetic Comparison to Other Wood Finishes
Compared to other wood finishes, clear cedar tongue and groove offers a distinct aesthetic. While hardwoods like oak or walnut provide a more formal and polished look, clear cedar offers a more relaxed, natural feel. Compared to painted finishes, clear cedar brings a sense of warmth and texture that paint cannot replicate. Its natural variations in color and grain create a unique character, unlike the uniformity of manufactured materials. The overall aesthetic leans towards rustic charm, but with careful selection and finishing, it can achieve a contemporary or transitional style.
Creative Uses in Furniture and Architectural Details
The versatility of clear cedar tongue and groove extends beyond wall and ceiling applications. It can be creatively incorporated into furniture pieces, such as custom shelving units, headboards, or even entire wall units. Architectural details can be enhanced with its use, including coffered ceilings, wainscoting, or decorative beams. The natural grain can be showcased in these applications, adding a unique element of visual interest. Imagine, for instance, a custom-built cedar headboard with subtly varying shades of light and dark wood, mirroring the wall paneling and adding a cohesive design element to the bedroom.
Influence of Lighting on Appearance
Lighting significantly impacts the appearance of clear cedar tongue and groove. Natural daylight enhances the wood’s natural color variations and grain patterns, showcasing its rich texture. Soft, warm lighting, such as incandescent or warm-toned LED lights, amplifies the wood’s warmth and creates a cozy atmosphere. In contrast, harsh, cool lighting can wash out the color and diminish the texture, making the wood appear less appealing. Therefore, careful consideration of lighting design is crucial to fully appreciate the beauty of this material.
Modern Farmhouse Style Room with Clear Cedar Tongue and Groove
The room is bathed in soft, natural light streaming through large windows. A wall of clear cedar tongue and groove, exhibiting subtle variations in its warm honey-brown tones, extends from floor to ceiling. The natural grain patterns are beautifully highlighted, creating a sense of rustic charm. A whitewashed brick fireplace provides a striking contrast, while simple, minimalist furniture in neutral tones keeps the focus on the natural beauty of the wood. A large, woven rug adds texture and warmth to the floor, completing the serene and inviting atmosphere of the modern farmhouse design. The overall effect is one of understated elegance and natural simplicity.
Sustainability and Environmental Impact
Clear cedar tongue and groove offers a compelling blend of aesthetic appeal and environmental responsibility. Understanding the sustainability of this material requires examining its lifecycle, from harvesting to disposal, and comparing it to alternatives. This section will delve into the environmental impact of cedar harvesting, responsible sourcing certifications, carbon footprint comparisons, long-term durability, and responsible disposal options.
The environmental impact of harvesting cedar wood is multifaceted. While responsible forestry practices minimize negative effects, clear-cutting and unsustainable harvesting methods can lead to deforestation, habitat loss, and soil erosion. However, when sourced from sustainably managed forests, cedar harvesting can be a relatively low-impact process, especially when compared to materials requiring energy-intensive manufacturing processes.
Sustainable Forestry Certification
Several certifications ensure responsible cedar sourcing. These certifications verify that the wood originates from forests managed according to strict environmental and social standards. Examples include the Forest Stewardship Council (FSC) and the Sustainable Forestry Initiative (SFI). These organizations establish criteria for sustainable forest management, encompassing aspects like biodiversity conservation, soil protection, and responsible harvesting techniques. Products carrying these certifications provide assurance that the cedar used is environmentally responsible.
Carbon Footprint Comparison
Clear cedar tongue and groove boasts a relatively low embodied carbon footprint compared to many alternative building materials. Unlike materials such as concrete or steel, which require significant energy input during manufacturing, cedar is a naturally occurring, renewable resource. The energy required for harvesting and processing cedar is generally less than that needed for producing alternatives. For example, studies have shown that the carbon footprint of wood is significantly lower than that of steel or concrete, particularly when considering the entire lifecycle of the material. This difference is primarily due to the energy-intensive manufacturing processes associated with steel and concrete production.
Long-Term Durability and Lifespan
Cedar’s natural resistance to rot and decay contributes to its exceptional longevity. Properly treated and maintained, clear cedar tongue and groove can last for decades, minimizing the need for frequent replacements. This extended lifespan reduces the overall environmental impact by decreasing the demand for new materials and reducing waste generation over time. Many historical structures featuring cedar wood testify to its remarkable durability and resilience.
Responsible Disposal and Recycling
Responsible disposal and recycling options for cedar wood are crucial for minimizing environmental impact at the end of its lifespan.
Options for responsible disposal include:
- Recycling/Repurposing: Cedar wood can often be salvaged and repurposed for other projects, extending its useful life and reducing waste.
- Composting (for untreated wood): Untreated cedar can be composted, returning nutrients to the soil.
- Incineration (with energy recovery): In some cases, incineration with energy recovery can be a viable option, generating energy from the wood waste.
- Landfill (as a last resort): Landfilling should be considered only as a last resort, as it contributes to landfill space constraints and methane emissions.
Clear cedar tongue and groove offers a compelling blend of aesthetics, durability, and sustainability. By understanding its unique properties, mastering installation techniques, and implementing proper maintenance, you can unlock its full potential to create stunning and enduring spaces. From the initial selection process to the final finishing touches, this guide has provided a roadmap to successful integration. Embrace the natural beauty and lasting quality of clear cedar tongue and groove to elevate your next project.
Frequently Asked Questions: Clear Cedar Tongue And Groove
What is the lifespan of clear cedar tongue and groove?
With proper maintenance, clear cedar tongue and groove can last for decades, even exceeding a century in some cases.
Can clear cedar tongue and groove be used outdoors?
Yes, but it requires proper sealing and treatment to protect it from the elements. Consider using exterior-grade cedar and a high-quality sealant.
How do I clean clear cedar tongue and groove?
Regular dusting is sufficient. For deeper cleaning, use a mild soap and water solution, rinsing thoroughly and allowing it to dry completely.
Is clear cedar tongue and groove difficult to install?
While manageable for DIYers, proper planning and attention to detail are crucial. Following a step-by-step guide and using the right tools will ensure a successful installation.
What are the common causes of warping in clear cedar tongue and groove?
Improper acclimation to the environment before installation and insufficient sealing against moisture are common culprits.
