Cedar wood siding, a timeless choice for homeowners seeking both beauty and durability, offers a captivating blend of natural aesthetics and lasting performance. This comprehensive guide delves into the multifaceted world of cedar siding, exploring its various types, installation techniques, maintenance requirements, cost considerations, design applications, and environmental impact. Whether you’re a seasoned DIY enthusiast or a homeowner embarking on a new construction or renovation project, understanding the nuances of cedar siding is key to making informed decisions that enhance your home’s curb appeal and longevity.
From selecting the ideal cedar species—considering factors like Western Red Cedar’s inherent resistance to decay versus the lighter color of Eastern White Cedar—to mastering the intricacies of installation methods like lap siding or board and batten, this guide provides a detailed roadmap for success. We’ll navigate the financial aspects, comparing cedar’s cost to alternatives and outlining budgeting strategies, and we’ll also explore the aesthetic possibilities, showcasing how different stains and finishes can transform the look of your home. Ultimately, this guide empowers you to make the best choices for your unique project, balancing aesthetics, budget, and environmental considerations.
Types of Cedar Wood Siding
Cedar wood siding offers a beautiful and durable exterior cladding option for homes. Its natural resistance to decay and insects, combined with its aesthetically pleasing grain and color variations, makes it a popular choice among homeowners. However, understanding the different types of cedar and their properties is crucial for making an informed decision. This section details the various species and grades of cedar used in siding, highlighting their unique characteristics and maintenance needs.
Cedar Species and Grades
Cedar siding is primarily sourced from two main species: Western Red Cedar and Eastern White Cedar. Each species exhibits variations in color, grain, and durability, influencing its suitability for different applications and climates. Within each species, different grades are available, reflecting the quality of the wood and its visual appeal. Higher grades generally feature fewer knots and more consistent color, resulting in a more uniform appearance and potentially higher cost. Lower grades, while more economical, may exhibit more knots and variations in color, adding character to the finished product. The choice between species and grade depends largely on budget, aesthetic preferences, and the desired level of maintenance.
Color and Grain Variations in Cedar Siding
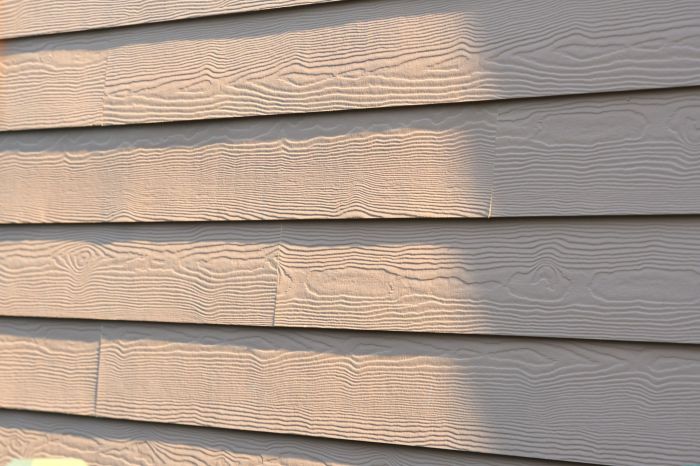
Western Red Cedar typically ranges in color from a light, reddish-brown to a deep, rich brown, often exhibiting a striking grain pattern. The color can darken over time due to exposure to the elements, developing a beautiful silver-gray patina. Eastern White Cedar, on the other hand, possesses a lighter, more yellowish-white hue with a finer grain. Its color tends to remain relatively consistent over time, though it may also weather to a silvery-gray. The grain patterns in both species can vary, with some boards displaying more pronounced and visible grain than others. This natural variation contributes to the unique character and charm of cedar siding.
Durability and Maintenance of Cedar Siding
Both Western Red Cedar and Eastern White Cedar are naturally resistant to decay and insect damage, thanks to their high concentration of natural oils. However, Western Red Cedar is generally considered more durable and weather-resistant due to its denser wood structure. Regular maintenance, such as cleaning and occasional staining or sealing, is recommended to prolong the lifespan of cedar siding and maintain its aesthetic appeal. While both species are relatively low-maintenance, Western Red Cedar may require less frequent maintenance due to its superior durability. Neglecting maintenance can lead to premature weathering, cracking, and increased susceptibility to damage from moisture and insects.
Comparison of Common Cedar Species
| Cedar Species | Cost | Lifespan (Years) | Maintenance Needs |
|---|---|---|---|
| Western Red Cedar | Higher | 30-50+ | Moderate (periodic cleaning, staining/sealing recommended) |
| Eastern White Cedar | Lower | 25-40+ | Moderate to High (more frequent cleaning and potential for earlier staining/sealing) |
Installation Methods for Cedar Wood Siding
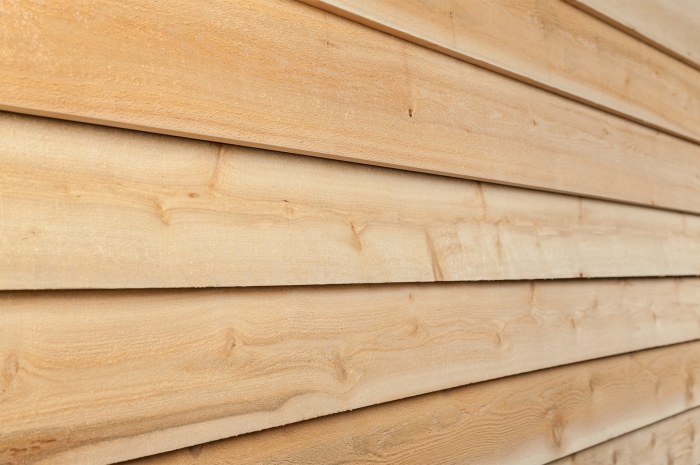
Installing cedar wood siding requires careful planning and execution to ensure a durable and aesthetically pleasing finish. Proper installation techniques are crucial for preventing water damage, rot, and other issues that can significantly shorten the lifespan of the siding. This section details the process, emphasizing best practices for various installation methods.
Tools and Materials
A successful cedar siding installation necessitates a range of tools and materials. Essential tools include a measuring tape, level, chalk line, circular saw, miter saw (for intricate cuts), hammer, nail gun (recommended for efficiency), safety glasses, work gloves, and a ladder. Materials needed are cedar siding boards (pre-primed or untreated, depending on preference), house wrap (for moisture protection), starter strips, flashing (for windows and doors), appropriate nails or screws, and caulk. Additional tools like a speed square and a pry bar can be helpful, especially for more complex installations.
Step-by-Step Installation Process
The installation process begins with proper preparation. First, ensure the sheathing is properly installed and inspected for any damage. Then, install house wrap, overlapping seams by at least 6 inches to prevent moisture penetration. Next, install starter strips along the bottom edge of the wall, creating a level base for the first course of siding. Install the first course of siding, ensuring proper alignment and spacing. Subsequent courses are installed, overlapping the previous course by the specified amount (usually 1 inch for lap siding). Use appropriate fasteners, ensuring they are driven straight and flush to avoid damage to the wood. Continue this process until the entire wall is covered. Around windows and doors, install flashing to prevent water intrusion. Finally, caulk any gaps or seams to create a weathertight seal.
Lap Siding Installation
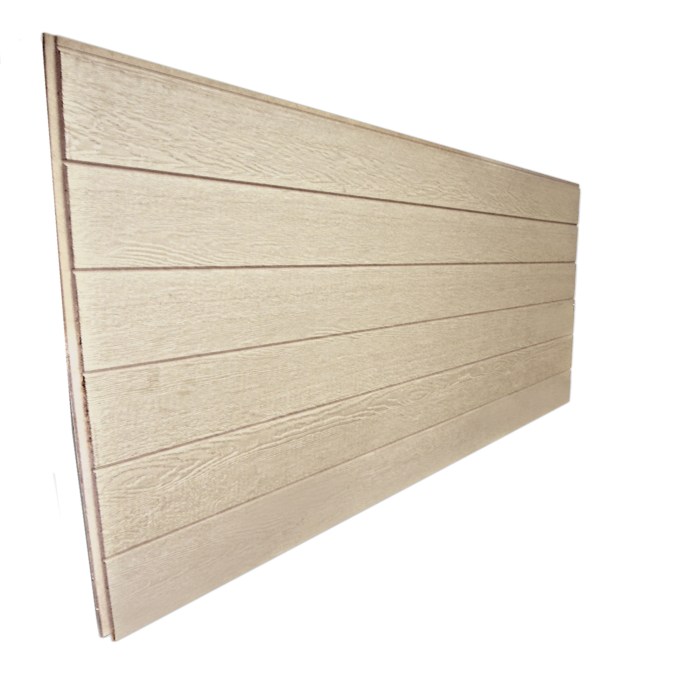
Lap siding is a common and relatively straightforward method. The image depicting this would show a series of horizontal boards, each overlapping the one below by a consistent amount. The illustration would clearly display the use of starter strips at the bottom, and the consistent overlap between boards, creating a clean, staggered look. The image would highlight proper nail placement, avoiding splitting the wood, typically near the bottom edge of each board, slightly above the overlap. The image would also illustrate the use of flashing around windows and doors.
Board and Batten Installation
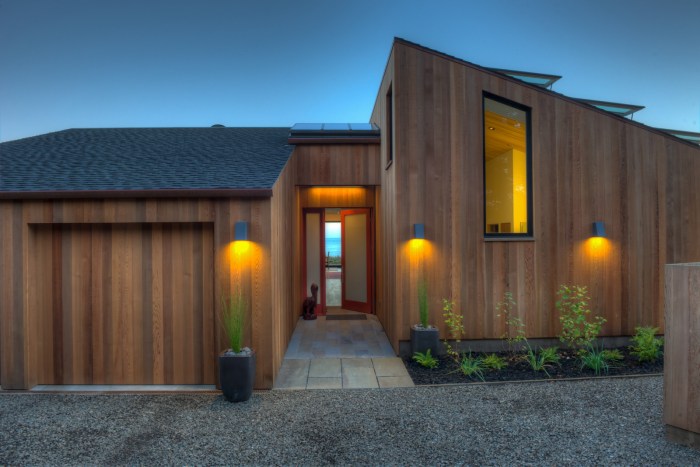
Board and batten siding provides a more rustic and textured look. A visual representation would show wider vertical boards (boards) with narrower strips (battens) covering the seams between them. The illustration would depict the boards being installed vertically, with battens carefully aligned to cover the gaps, creating a clean, vertical line. The image would demonstrate proper fastening techniques for both boards and battens, ensuring secure attachment while minimizing visible fasteners. The illustration would also showcase the use of caulking to seal the joints between the boards and battens.
Ensuring Proper Ventilation
Adequate ventilation behind the siding is critical for preventing moisture buildup and rot. This is achieved through proper installation of house wrap and the creation of ventilation channels. The illustration would show the house wrap being installed with proper overlap, creating a continuous moisture barrier. It would also demonstrate the importance of leaving a small gap between the siding and the house wrap to allow for air circulation. This gap can be achieved through the use of furring strips or proper spacing during installation. The image would depict the flow of air behind the siding, illustrating how this ventilation helps to keep the wood dry and extend its lifespan.
Maintenance and Care of Cedar Wood Siding
Cedar wood siding, with its natural beauty and durability, requires proper maintenance to ensure its longevity and aesthetic appeal. Regular care prevents premature deterioration and maintains the home’s curb appeal for years to come. Neglecting maintenance can lead to costly repairs, including rot, insect infestation, and premature fading. This section details the necessary steps for preserving your cedar siding investment.
Cleaning Cedar Siding
Effective cleaning removes dirt, mildew, and other debris that can accumulate on cedar siding over time. The cleaning method depends on the severity of the soiling. For light cleaning, a simple solution of mild detergent and water, applied with a soft-bristled brush, is often sufficient. Rinse thoroughly with clean water afterward to prevent soap residue from building up. For more stubborn stains or mildew, a solution of bleach and water (following manufacturer’s instructions carefully and wearing appropriate safety gear) can be effective, but should be used sparingly and tested on an inconspicuous area first to avoid damage. Power washing should be avoided unless absolutely necessary, as the high pressure can damage the wood’s surface. Always allow the siding to dry completely after cleaning.
Preventing Weather Damage
Cedar wood is naturally resistant to decay, but it’s still susceptible to damage from prolonged exposure to moisture. Regular inspections for signs of water damage, such as discoloration or swelling, are crucial. Properly functioning gutters and downspouts are essential to divert water away from the foundation and siding. Consider adding drip edges to overhangs to further protect the siding from rain. Regularly inspect and repair any damaged or missing caulk around windows and doors to prevent water infiltration. A high-quality, water-repellent sealant can be applied periodically to enhance the wood’s natural resistance to moisture, but avoid applying it too frequently as it can trap moisture.
Protecting Against Insects and Fungi
Cedar wood is naturally resistant to insect infestation, but preventative measures are still recommended. Regular inspections for signs of insect activity, such as bore holes or insect frass (wood dust), are vital. Promptly addressing any infestations with appropriate insecticides is crucial to prevent widespread damage. Fungicides can be used to prevent and treat fungal growth, such as mildew. Again, always follow manufacturer instructions and test in an inconspicuous area before widespread application. Maintaining good ventilation around the siding can also help to prevent fungal growth. Properly storing firewood away from the house helps prevent insect infestations from spreading to the siding.
Yearly Maintenance Checklist
Regular maintenance is key to preserving your cedar siding. A yearly checklist ensures consistent care and helps catch potential problems early.
- Inspect siding for damage, including cracks, splits, rot, and insect infestation.
- Clean siding using a mild detergent and water solution or a bleach solution (if necessary).
- Inspect and clean gutters and downspouts to ensure proper water drainage.
- Repair any damaged or missing caulk around windows and doors.
- Inspect and repair any damaged flashing.
- Reapply a water-repellent sealant if needed (every 3-5 years, depending on climate and sealant type).
- Treat any insect or fungal infestations promptly.
Cost and Budget Considerations for Cedar Wood Siding
Cedar wood siding offers undeniable aesthetic appeal and durability, but its cost is a significant factor homeowners must consider before embarking on a project. Understanding the various cost components and comparing cedar to alternatives allows for informed budgeting and realistic project planning. This section details the cost breakdown, influencing factors, and a sample budget for a typical cedar siding project.
Material Costs
The cost of cedar wood siding varies significantly depending on the grade, thickness, and type of cedar used. Clear, high-grade cedar, free of knots and imperfections, commands a premium price compared to lower-grade options with more knots and variations in color. Thickness also impacts cost; thicker siding offers greater durability and insulation but comes at a higher price point. For example, 1×6 cedar siding will typically cost more per square foot than 1×4. Additionally, the type of cedar (Western Red Cedar, Eastern White Cedar, etc.) will influence the cost, with Western Red Cedar often being more expensive due to its higher demand and superior weather resistance. Expect to pay anywhere from $6 to $15 per square foot for the siding materials alone, depending on these factors. This does not include other necessary materials such as flashing, fasteners, and trim.
Labor Costs, Cedar wood siding
Labor costs represent a substantial portion of the overall project expense. The complexity of the installation, the size of the house, and the experience level of the contractor all influence labor costs. A simple, straightforward installation on a smaller house might cost less per square foot than a complex project requiring intricate cuts, custom detailing, or extensive repairs to existing siding. Expect to pay between $3 and $8 per square foot for labor, depending on these variables. This cost can vary significantly based on location and the prevailing wage rates for skilled labor in your area.
Permit Costs
Building permits are required in most jurisdictions before starting exterior renovations. The cost of permits varies greatly depending on location and the size of the project. Typically, permit fees are a relatively small percentage of the overall project cost, but it’s crucial to budget for them to avoid project delays. Contact your local building department to obtain an accurate estimate of permit fees for your specific project.
Comparison to Other Cladding Options
Cedar siding is generally more expensive than vinyl siding and often more expensive than fiber cement siding. Vinyl siding is the most budget-friendly option, offering lower material and labor costs. However, it lacks the natural beauty and longevity of cedar. Fiber cement siding provides a good balance between cost and durability, but its appearance may not be as aesthetically pleasing as cedar. The following table provides a rough cost comparison per square foot for materials and labor:
| Siding Type | Material Cost ($/sq ft) | Labor Cost ($/sq ft) |
|---|---|---|
| Cedar Wood | $6 – $15 | $3 – $8 |
| Vinyl | $2 – $5 | $2 – $4 |
| Fiber Cement | $4 – $10 | $3 – $6 |
Influence of Siding Thickness and Installation Complexity
As mentioned previously, thicker cedar siding is more expensive but offers superior durability and insulation. A thicker board will also increase labor costs slightly due to the added weight and potential difficulty in handling. Similarly, installation complexity directly impacts labor costs. Projects with intricate details, such as dormers, gables, or complex trim work, require more time and expertise, thus increasing the labor cost. A simple, flat-surface installation will be significantly less expensive than a project involving many angles and detailed trim.
Sample Budget for a Cedar Siding Project
This sample budget assumes a 1,500 square foot house with moderate installation complexity. Remember that this is an estimate, and actual costs may vary based on location, materials chosen, and contractor rates.
| Expense Category | Cost per sq ft ($) | Total Cost ($) |
|---|---|---|
| Materials (Cedar Siding, Fasteners, Flashing, Trim) | $10 | $15,000 |
| Labor | $5 | $7,500 |
| Permits | $1 | $1,500 |
| Total Estimated Cost | $16 | $24,000 |
Design Considerations and Aesthetics: Cedar Wood Siding
Cedar wood siding offers a unique opportunity to significantly enhance a home’s curb appeal, moving beyond mere functionality to create a visually stunning and lasting impression. The natural beauty of the wood, its varied textures, and the range of finishing options allow for a high degree of customization, making it suitable for a diverse array of architectural styles and personal preferences.
Cedar siding’s inherent warmth and natural variations in color and grain contribute to a welcoming and inviting aesthetic. Its versatility allows it to blend seamlessly with both traditional and contemporary designs, creating a timeless appeal that increases property value and homeowner satisfaction. The ability to customize the appearance through staining and finishing techniques further amplifies its design potential.
Cedar Siding and Architectural Styles
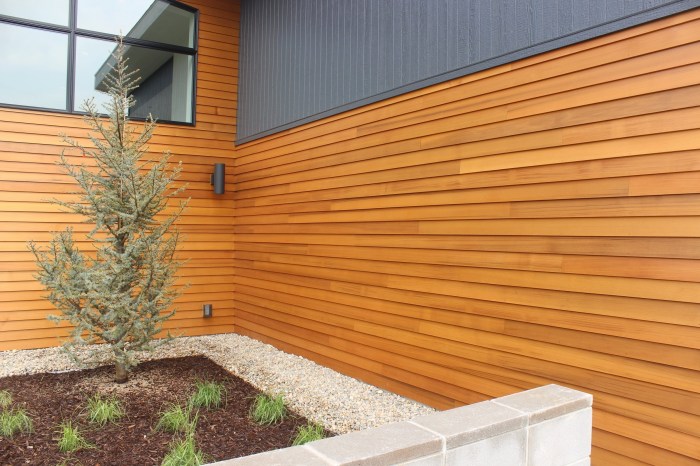
Cedar wood siding’s adaptability makes it a suitable choice for a wide range of architectural styles. For example, its natural texture and rustic charm complement traditional homes, such as Cape Cods and Craftsman-style houses. The clean lines and vertical orientation of the siding can also be effectively used on contemporary homes, creating a modern and sleek look. In rustic settings, cedar siding blends effortlessly with the surrounding landscape, while its ability to withstand the elements makes it ideal for homes in coastal regions. The choice of cedar siding profile (e.g., bevel, channel, clapboard) further enhances its adaptability to different architectural styles. A Craftsman home might benefit from wider, more rustic clapboards, while a modern farmhouse might showcase narrower, more refined bevel siding.
Staining and Finishing Techniques for Cedar Siding
The final appearance of cedar siding is significantly influenced by the choice of stain or finish. A clear sealer will highlight the natural wood grain and color variations, allowing the beauty of the cedar to shine through. Semi-transparent stains offer subtle color enhancement while still allowing the wood grain to show. Solid-color stains provide a more opaque finish, creating a uniform color across the siding. Each option offers a unique aesthetic, impacting the overall feel of the home. For instance, a clear sealer might be chosen for a home aiming for a natural, rustic look, while a deep, rich stain might be selected for a more dramatic and modern aesthetic. Proper preparation and application are crucial for achieving the desired results and ensuring the longevity of the finish. Regular maintenance, such as cleaning and reapplication of sealant, will help protect the siding and maintain its appearance over time.
Cedar Siding and House Colors
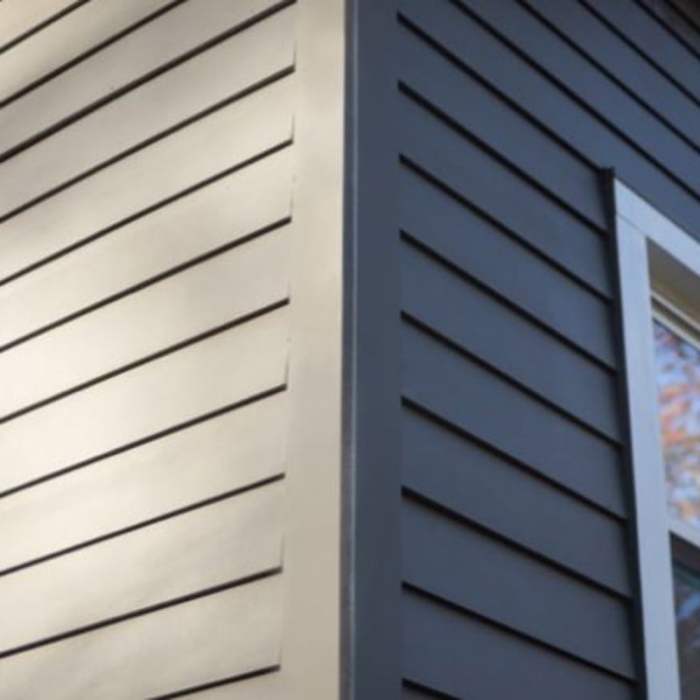
The color of the cedar siding significantly impacts the overall visual harmony of the home. Neutral tones, such as grays, tans, and browns, create a classic and timeless look that complements a wide range of house colors. These colors are versatile and can be easily integrated into various architectural styles. Darker stains, such as deep browns or blacks, can add drama and sophistication, particularly when paired with lighter-colored house trim or accents. Lighter stains, such as pale grays or whites, create a bright and airy feel, often used on homes with more vibrant or contrasting house colors. For example, a light gray cedar siding might beautifully complement a white or cream-colored house, while a dark brown cedar siding could create a stunning contrast against a light beige or yellow house. Careful consideration of the surrounding landscape and the homeowner’s personal preferences should guide the final color selection.
Environmental Impact and Sustainability
Cedar wood siding offers a compelling blend of aesthetic appeal and environmental responsibility. Its inherent durability and natural beauty make it a desirable choice for homeowners, but its sustainability and overall environmental impact warrant careful consideration. This section will delve into the environmental benefits and drawbacks associated with using cedar wood siding, comparing it to alternative materials and examining responsible sourcing practices.
Cedar wood siding boasts several significant environmental advantages. Being a naturally renewable resource, sustainably harvested cedar contributes less to carbon emissions than many manufactured alternatives. The carbon sequestration capabilities of living cedar trees further enhance this benefit, effectively removing carbon dioxide from the atmosphere. Furthermore, cedar’s inherent resistance to rot and decay reduces the need for frequent replacements, minimizing waste and extending the lifespan of the building’s exterior.
Environmental Benefits of Cedar Wood Siding
The environmental benefits of cedar siding extend beyond its renewable nature. Cedar forests, when managed responsibly, support biodiversity and provide crucial habitats for various plant and animal species. The use of cedar wood, therefore, can indirectly contribute to ecosystem health when sourced sustainably. Additionally, compared to materials like vinyl or composite siding, cedar requires less energy to produce, resulting in a smaller carbon footprint during its manufacturing process. Finally, cedar is biodegradable, unlike many synthetic alternatives, meaning it will eventually decompose without leaving behind persistent harmful pollutants.
Comparison with Other Exterior Cladding Materials
A comparison of cedar siding’s environmental footprint with other common exterior cladding materials reveals several key differences. Vinyl siding, for instance, is a petroleum-based product with a high carbon footprint during its manufacturing and transportation. Its longevity is considerable, but its non-biodegradability poses a significant environmental challenge at the end of its life cycle. Aluminum siding, while recyclable, requires substantial energy for its production. Fiber cement siding, a more sustainable alternative, still has a higher embodied carbon compared to cedar and involves the use of cement production which is known to be energy-intensive. The choice of cladding material, therefore, significantly impacts the overall environmental performance of a building.
Sustainable Sourcing of Cedar Wood
The sustainability of cedar wood siding hinges critically on responsible forestry practices. Unsustainable logging can lead to deforestation, habitat loss, and soil erosion. Conversely, responsible forestry practices, such as selective harvesting and replanting, ensure the long-term health of cedar forests. These practices maintain biodiversity, prevent soil degradation, and minimize the environmental impact of wood harvesting. Furthermore, the certification of cedar wood products guarantees adherence to these sustainable forestry practices.
Certifications and Labels for Sustainable Cedar Wood
Several certifications and labels ensure the sustainable sourcing of cedar wood products. These certifications provide assurance that the wood has been harvested according to strict environmental standards.
- Forest Stewardship Council (FSC) certification: This is a widely recognized certification that ensures the wood comes from forests managed according to strict environmental and social standards.
- Sustainable Forestry Initiative (SFI) certification: This certification promotes sustainable forest management practices, ensuring responsible harvesting and reforestation.
- Programme for the Endorsement of Forest Certification (PEFC): This international certification system provides assurance of responsible forest management.
These certifications offer consumers a means to make informed choices and support environmentally responsible forestry practices. Choosing cedar siding bearing these labels contributes directly to the preservation of cedar forests and the overall health of the environment.
Choosing cedar wood siding represents a significant investment in your home’s aesthetic appeal and structural integrity. By carefully considering the factors Artikeld in this guide—from species selection and installation techniques to maintenance strategies and cost analysis—you can ensure a successful project that enhances your property’s value and provides years of enjoyment. Remember, the beauty of cedar wood siding extends beyond its visual charm; it’s a testament to sustainable practices and the enduring allure of natural materials. With proper planning and execution, your cedar siding investment will stand as a symbol of quality craftsmanship and timeless style.
Expert Answers
What is the best time of year to install cedar wood siding?
Spring or fall are generally ideal, avoiding extreme heat or cold that can impact installation and curing.
How often should I stain or seal my cedar siding?
Every 3-5 years, depending on climate and exposure, is a good rule of thumb. Regular inspection is crucial.
Can I paint cedar wood siding instead of staining it?
Yes, but proper preparation is essential. Priming is usually necessary to ensure paint adhesion and longevity.
What are some common problems with cedar siding, and how can I prevent them?
Issues include rot, insect infestation, and warping. Proper ventilation, regular maintenance, and timely treatment of problems are key to prevention.
How long does it take to install cedar wood siding on an average-sized home?
This varies greatly based on house size and complexity, but it can range from several days to several weeks.
