Hardie board and batten installation offers a durable and aesthetically pleasing exterior siding solution. This comprehensive guide walks you through every step, from initial planning and material selection to the final finishing touches, ensuring a professional-looking result. We’ll cover everything from choosing the right materials and tools to mastering the techniques for cutting, fastening, and creating that signature batten effect. Whether you’re aiming for a rustic farmhouse charm or a sleek modern aesthetic, this guide provides the expertise to achieve your vision.
Understanding the nuances of Hardie board and batten installation is key to a successful project. Proper preparation, precise measurements, and careful execution are crucial for a long-lasting, attractive finish. This guide delves into the intricacies of each stage, providing clear instructions and helpful tips to navigate potential challenges and achieve exceptional results. From framing and sheathing to the final caulking, we’ll cover it all.
Introduction to Hardie Board and Batten
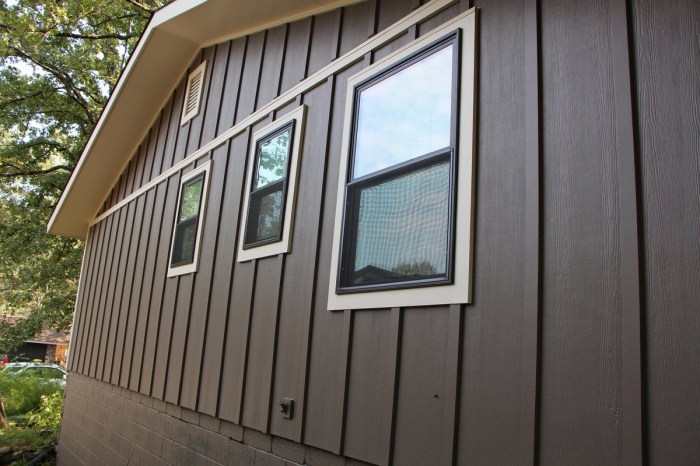
Hardie board and batten siding is a popular exterior cladding choice known for its durability and aesthetic appeal. It combines the strength and longevity of fiber cement boards with the classic, visually appealing look of traditional batten siding. This combination results in a low-maintenance, long-lasting exterior that can enhance the curb appeal of any home.
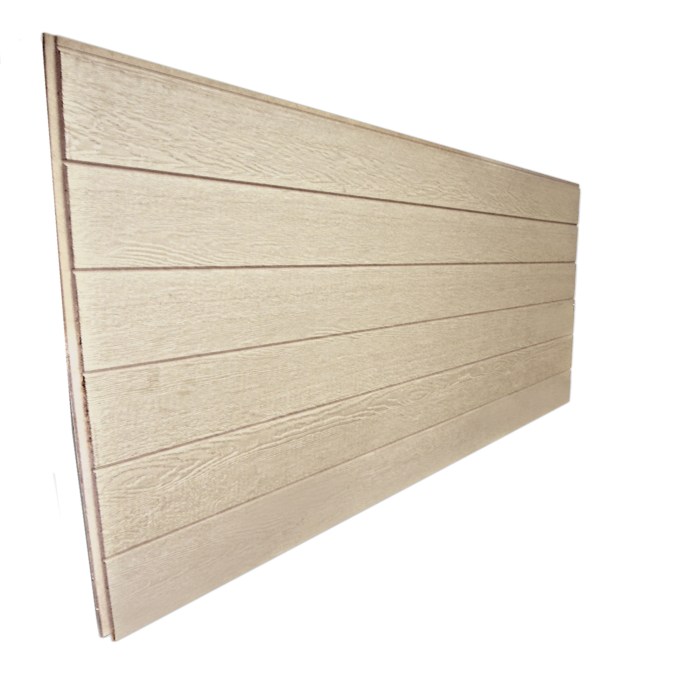
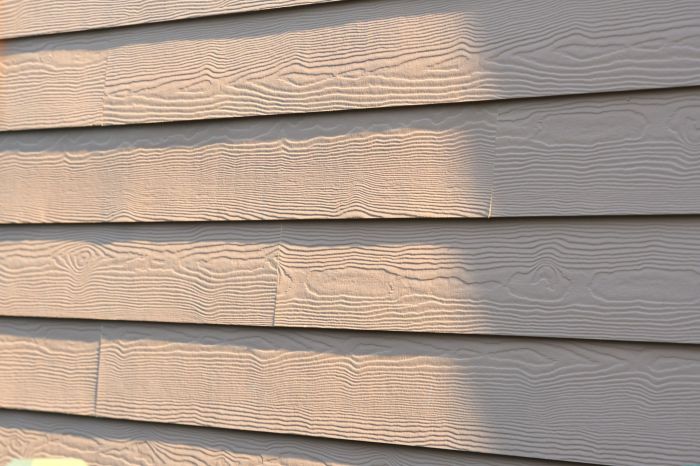
Hardie board and batten siding consists primarily of fiber cement, a composite material made from Portland cement, cellulose fibers, and other additives. The cement provides strength and fire resistance, while the cellulose fibers add flexibility and reduce brittleness. The final product is a durable, weather-resistant panel that’s available in a variety of colors and textures to mimic the look of wood, stone, or stucco. The batten, or vertical strips, are typically applied over the wider Hardie board panels, creating a distinct and visually appealing pattern. This creates a layered look that adds depth and texture to the home’s exterior.
Advantages of Hardie Board and Batten Siding
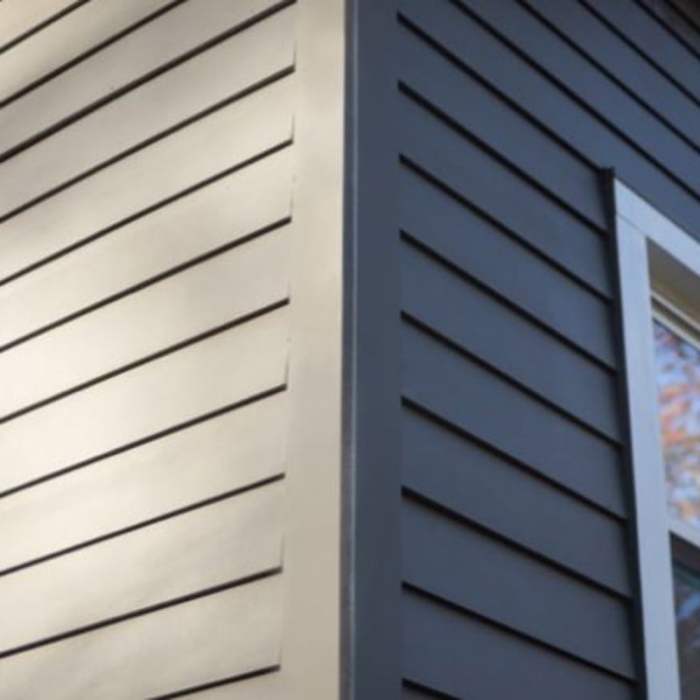
Hardie board and batten offers several advantages over other siding materials. Its superior durability is a key selling point, resisting damage from impacts, moisture, insects, and rot—problems frequently associated with wood siding. Furthermore, it’s non-combustible, providing a significant fire safety advantage over many alternatives. Its low maintenance requirements also save homeowners time and money in the long run, compared to the regular painting and repairs needed for wood siding. Finally, its versatility allows for a wide range of design styles, from traditional to contemporary. The availability of various colors and textures allows for customization to match diverse architectural styles and personal preferences. For instance, a homeowner could choose a deep gray to complement a modern farmhouse, or a warm beige to enhance a craftsman-style home.
Lifespan and Maintenance of Hardie Board and Batten
Hardie board and batten siding boasts a remarkably long lifespan, typically lasting 30-50 years or more with proper installation and maintenance. This longevity significantly reduces the frequency of costly replacements compared to other siding materials. Maintenance primarily involves periodic cleaning to remove dirt and debris, which can be easily accomplished with a garden hose and a soft brush. While the material is resistant to fading, occasional repainting or re-staining might be needed after many years, depending on the climate and exposure to the elements. Regular inspections for any signs of damage are recommended, allowing for prompt repairs to prevent further deterioration. For example, minor chips or cracks can be easily repaired with a suitable patching compound. This proactive approach ensures the long-term beauty and integrity of the siding.
Planning and Preparation for Installation
Successful Hardie board and batten installation hinges on meticulous planning and preparation. Failing to adequately plan can lead to material waste, installation delays, and ultimately, a subpar finished product. This section details the crucial steps involved in preparing for your project.
Material Calculation and Measurement
Accurate material calculation is paramount to avoid costly overages or frustrating shortages. Begin by carefully measuring the total surface area requiring coverage. This involves measuring the length and height of each wall section to be clad. Remember to account for windows, doors, and other openings, subtracting their areas from the total. For example, a wall measuring 10 feet wide by 8 feet high has a surface area of 80 square feet (10ft x 8ft = 80 sq ft). If a window measuring 3 feet wide by 4 feet high (12 sq ft) is present, the net area requiring Hardie board is 68 square feet (80 sq ft – 12 sq ft = 68 sq ft). Always add at least 10% extra to account for cuts, waste, and potential errors. This ensures you have sufficient material to complete the job without interruption. Finally, determine the quantity of batten strips needed based on the design and spacing you have chosen. Consult the manufacturer’s specifications for accurate coverage per panel and board size.
Necessary Tools and Equipment
Having the right tools readily available streamlines the installation process and enhances efficiency. A comprehensive checklist should include: measuring tape, level, chalk line, circular saw with fine-tooth blade (for cutting Hardie board), jigsaw (for intricate cuts), nail gun (with appropriate nails for Hardie board), safety glasses, work gloves, caulk gun, exterior-grade caulk, hammer, utility knife, ladder (if necessary), and scaffolding (for taller projects). Consider also having a speed square for precise angle cuts, a pry bar for removing existing siding (if applicable), and a drop cloth to protect the surrounding area from debris. Prioritize using tools specifically designed for Hardie board to ensure clean cuts and proper installation.
Sample Project Plan
A well-defined project plan ensures a smooth and timely installation. This sample plan Artikels the key phases:
| Phase | Tasks | Timeline (Example) |
|---|---|---|
| Preparation | Measure and calculate materials; acquire necessary tools and equipment; prepare the work area; obtain necessary permits (if required). | 1-2 days |
| Framing (if necessary) | Install any required sheathing or furring strips to ensure a flat and even surface for the Hardie board. | 1-2 days |
| Hardie Board Installation | Install Hardie board panels, ensuring proper alignment, spacing, and fastening. | 3-5 days |
| Batten Installation | Install batten strips, ensuring proper spacing and alignment. | 1-2 days |
| Caulking and Finishing | Caulk all seams and joints; prime and paint the installed Hardie board and battens. | 2-3 days |
This timeline is an example and may vary depending on the project size and complexity. Remember to factor in potential delays and allocate extra time for unforeseen circumstances. Always prioritize safety and adhere to manufacturer’s instructions throughout the installation process.
Installation Process
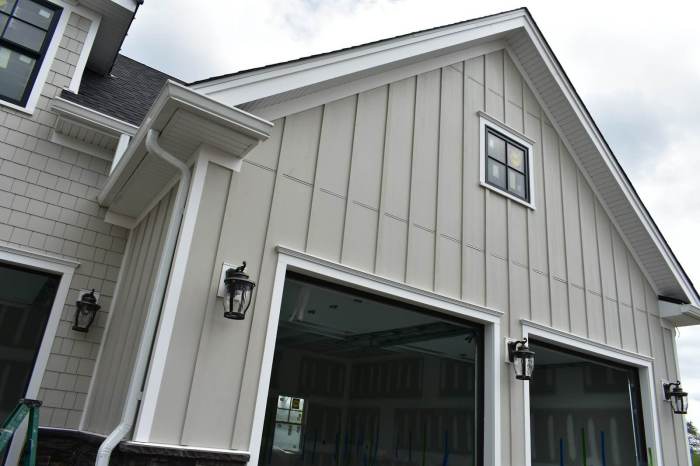
Preparing the wall framing and installing sheathing are crucial steps in ensuring a durable and long-lasting Hardie board and batten installation. Proper preparation at this stage prevents future problems and contributes significantly to the overall aesthetic appeal of the finished project. These steps require precision and attention to detail to achieve optimal results.
Wall Framing Preparation
Before installing Hardie board and batten, the wall framing must be properly prepared. This involves ensuring the framing is plumb, square, and structurally sound. Any damaged or warped framing members should be replaced. Furthermore, all framing members should be properly spaced and fastened according to building codes and manufacturer’s specifications. This ensures a stable and even surface for the sheathing and siding installation. Check for any gaps or inconsistencies in the framing and address them appropriately, ensuring a smooth surface for the subsequent layers. Using a level and square will help verify the accuracy of the framing. Any significant deviations should be corrected before proceeding to the next stage.
House Wrap or Weather Barrier Installation
Once the framing is complete and inspected, the next step involves installing a house wrap or weather barrier. This crucial layer acts as a secondary defense against moisture intrusion, protecting the underlying structure from water damage. The house wrap should be installed horizontally, overlapping each sheet by a minimum of 6 inches, and carefully sealed at all seams and overlaps using appropriate tape designed for this purpose. Proper installation of the house wrap is essential for maintaining the integrity of the wall assembly and preventing moisture-related issues such as mold and rot. Remember to extend the house wrap beyond the framing to ensure complete coverage. Carefully consider areas around windows and doors, ensuring a watertight seal around these critical points.
Sheathing Installation, Hardie board and batten installation
The sheathing, typically OSB (Oriented Strand Board) or plywood, provides a solid base for the Hardie board and batten. Sheets should be installed horizontally, ensuring proper spacing and overlapping according to the manufacturer’s recommendations and building codes. Fasteners should be driven straight and flush to avoid damaging the sheathing or creating protrusions that could interfere with the siding installation. It’s crucial to use appropriate fasteners for the type of sheathing and framing material. Stagger the seams of adjacent sheets to create a more stable and evenly distributed load across the wall. The sheathing should be firmly secured to the framing, minimizing any movement or flexing. For added protection against moisture, applying a sealant along the edges of the sheathing boards before installation can provide an extra layer of defense.
Installation Process
Installing Hardie board siding requires precision and attention to detail to ensure a durable and aesthetically pleasing finish. Proper cutting, fastening, and panel alignment are crucial for achieving a professional-looking result that will withstand the elements for years to come. This section details the steps involved in installing Hardie board panels, focusing on techniques for achieving clean lines and a secure installation.
Cutting and Fitting Hardie Board Panels
Accurate cutting is paramount for a seamless installation. Use a circular saw with a fine-tooth blade specifically designed for cutting fiber cement. Pre-mark cut lines clearly with a pencil to ensure straight cuts. For intricate cuts or curves, a jigsaw is more suitable. Always wear appropriate safety gear, including a dust mask and eye protection, as fiber cement produces fine dust. When fitting panels around corners or windows, measure carefully and make multiple test cuts to achieve the best fit. Remember to account for expansion and contraction of the material due to temperature fluctuations. Overlapping panels should be planned and executed to avoid gaps and ensure water tightness. Precise measurements and meticulous cuts minimize waste and ensure a professional finish.
Fastening Hardie Board to Sheathing
Secure fastening is essential for withstanding wind and other environmental stresses. Use galvanized nails or screws specifically designed for Hardie board. These fasteners are corrosion-resistant and provide superior holding power. The correct fastener length is crucial; it should penetrate the sheathing sufficiently without protruding through the front face of the panel. Follow the manufacturer’s recommended spacing guidelines for your specific Hardie board product. Consistent spacing prevents uneven panel expansion and contraction. Pre-drilling pilot holes is recommended, especially for thicker panels, to prevent cracking. Always drive fasteners straight to avoid damaging the panel. Uneven fastening can compromise the integrity of the siding, leading to potential damage or failure over time.
Creating Clean Lines and Avoiding Gaps
Maintaining straight lines and eliminating gaps between panels is key to achieving a professional-looking installation. Use a level and straight edge to guide panel placement, ensuring consistent alignment throughout the project. Spacing between panels should be consistent and in accordance with the manufacturer’s recommendations. Consider using panel-spacing aids or spacers to maintain uniformity. If gaps appear, carefully remove and reposition the panels. Small gaps can be filled with caulk designed for exterior use, ensuring a weathertight seal. Proper planning and meticulous execution minimize the need for corrective measures later. Paying close attention to detail during installation will ensure a finished product that is both visually appealing and structurally sound.
Common Fastening Patterns
The following table illustrates common fastening patterns for Hardie board, but always refer to the manufacturer’s instructions for your specific product. Fastener selection and placement directly impact the durability and longevity of your siding installation.
| Fastener Type | Spacing (inches) | Depth (inches) |
|---|---|---|
| 8d Galvanized Nails | 6-8 | 1 1/4 – 1 1/2 |
| Exterior-grade Stainless Steel Screws | 6-8 | 1 1/4 – 1 1/2 |
| Galvanized Ring Shank Nails | 6-8 | 1 1/4 – 1 1/2 |
Installation Process: Creating the Batten Effect: Hardie Board And Batten Installation
Achieving the distinctive batten look requires careful planning and precise execution. The visual appeal of the finished product hinges on consistent batten spacing, accurate alignment, and the selection of an appropriate batten style. This section details the process of installing battens over the Hardie board, ensuring a professional and aesthetically pleasing result.
The batten style and spacing significantly impact the overall aesthetic. Various options cater to different design preferences and architectural styles. Consider the home’s style, the surrounding landscape, and personal preferences when making these crucial decisions.
Batten Styles and Spacing Options
Several factors influence batten selection and placement. These include the overall design aesthetic, the size of the Hardie board panels, and the desired visual impact. Common batten styles include vertical, horizontal, and even diagonal applications, each offering a unique visual effect. Spacing can range from tightly spaced battens for a more modern look to widely spaced battens for a more rustic feel. The choice depends on personal preference and the desired visual outcome. For example, narrow battens spaced closely together create a sleek, contemporary appearance, while wider battens with more space between them offer a more traditional or farmhouse feel. Precise measurements are crucial to maintain uniformity throughout the installation.
Installing Battens Over Hardie Board
Once the Hardie board is installed and the surface is prepared, the installation of the battens can begin. Begin by marking the locations for the battens, ensuring consistent spacing throughout. This is crucial for maintaining a professional and visually appealing finish. Pre-drilling pilot holes in the battens before fastening them to the Hardie board prevents splitting. Use appropriate fasteners, such as galvanized nails or screws, to secure the battens. Ensure that the fasteners are countersunk to prevent them from protruding and damaging the final finish. A level should be used to ensure that each batten is perfectly aligned and straight. This process requires patience and attention to detail to achieve a clean, professional look. Using a nail gun can significantly speed up this process, but caution should be exercised to avoid damaging the Hardie board.
Ensuring Proper Alignment and Spacing of Battens
Maintaining consistent alignment and spacing is paramount for a visually appealing outcome. Before fastening each batten, check its alignment using a level and measure the spacing against the previously installed battens. Accurate spacing is best achieved by using spacers, consistently sized, between the battens. This ensures uniformity and prevents uneven gaps. Regularly check alignment throughout the installation process to catch and correct any discrepancies early on. Any misalignments can be corrected by carefully removing and repositioning the batten before fastening it permanently. The use of a chalk line can aid in marking straight lines for consistent batten placement. This systematic approach ensures a professional and aesthetically pleasing result.
Finishing Touches and Caulking
The final stage of Hardie board and batten installation involves meticulous attention to detail, ensuring a weathertight and aesthetically pleasing finish. Proper caulking is crucial for preventing water intrusion and maintaining the longevity of your siding. This section details the techniques and materials necessary for achieving a professional-looking, durable result.
Caulking effectively seals gaps and seams, preventing moisture from penetrating the siding system. This is especially critical in exterior applications where exposure to the elements is constant. The choice of caulk, its application method, and the attention to detail during application significantly impact the overall quality and lifespan of the installation.
Caulk Selection and Application
Choosing the right caulk is paramount for long-lasting protection. Exterior-grade, paintable acrylic latex caulk is a popular choice due to its flexibility, ease of application, and paintability. It effectively seals gaps and expands and contracts with temperature fluctuations, preventing cracking. Silicone caulk, while offering excellent water resistance, is less flexible and more challenging to paint, making it a less ideal choice for this application. Always ensure the caulk you select is specifically designed for exterior use and compatible with Hardie board. Application involves using a caulking gun to apply a continuous bead of caulk into all gaps and seams, ensuring complete coverage. Smooth the bead with a wet finger or a caulking tool for a neat, professional appearance. Avoid overfilling the joints, as this can lead to cracking.
Achieving a Professional Finish
A professional finish involves more than just filling gaps. Careful preparation and consistent technique are key. Before applying caulk, ensure all surfaces are clean and dry. Remove any loose debris or dust to ensure proper adhesion. Use painter’s tape to mask off adjacent areas to prevent accidental caulk spillage. Apply caulk in a smooth, continuous bead, avoiding gaps or interruptions. Immediately smooth the bead using a wet finger or a specialized caulking tool, creating a consistent, slightly concave profile. This prevents cracking and allows for better paint adhesion. After the caulk has cured (check the manufacturer’s instructions for curing time), carefully remove the painter’s tape.
Importance of Appropriate Caulking Materials for Exterior Applications
Using an inappropriate caulk can lead to significant problems. For example, using interior-grade caulk on an exterior application will result in premature failure due to UV degradation and moisture exposure. The caulk will likely crack and shrink, allowing water to penetrate the siding, leading to potential rot and damage to the underlying structure. Similarly, using a rigid caulk will not accommodate the expansion and contraction of the materials due to temperature changes, resulting in cracking and compromising the water barrier. Therefore, selecting a high-quality, flexible, exterior-grade caulk is a critical step in ensuring the longevity and performance of the Hardie board and batten installation. Properly applied, high-quality caulk acts as a critical component of the building envelope, protecting against water damage and enhancing the overall aesthetic appeal of the finished project.
Troubleshooting Common Installation Issues
Hardie board and batten siding, while durable and attractive, can present some installation challenges. Understanding potential problems and their solutions is crucial for a successful project, ensuring a long-lasting and aesthetically pleasing result. Addressing issues promptly minimizes rework and prevents costly mistakes.
Uneven Surfaces
Uneven wall surfaces are a common obstacle. Significant variations in the substrate can lead to gaps between the siding and the wall, compromising weather resistance and the overall appearance. To correct this, careful preparation is key. Before installation, ensure the wall is properly leveled and any significant irregularities are addressed. This might involve shimming out recessed areas or applying a leveling compound to fill in low spots. For minor imperfections, using furring strips to create a consistent plane before installing the Hardie board can significantly improve the final result. This creates a smooth, even surface for the siding to adhere to, eliminating unsightly gaps and ensuring a professional finish.
Gaps in Siding
Gaps between Hardie board panels are often caused by improper cutting, inadequate fastening, or expansion and contraction of the material due to temperature fluctuations. Consistent use of the manufacturer’s recommended spacing and fastening techniques is essential. Properly sized nails or screws, driven at the correct depth, prevent gaps. Expansion gaps, as recommended by the manufacturer, must be maintained. If gaps appear after installation, they can sometimes be addressed with appropriate caulking, ensuring the caulk is compatible with Hardie board and properly applied to create a weathertight seal. Larger gaps may require removal and replacement of affected panels.
Damaged or Warped Panels
Handling and transporting Hardie board requires care to prevent damage. Rough handling or exposure to moisture can lead to warping or cracking. Inspect panels carefully before installation; discard any damaged pieces. If warping occurs after installation, replacing the affected panel is usually the best solution. Attempting to force a warped panel into place will likely worsen the problem and compromise the integrity of the siding. Prevention is paramount; store panels properly, following manufacturer’s recommendations for protection from moisture and extreme temperatures. Using appropriate handling techniques during installation also minimizes the risk of damage.
Safety Precautions During Installation
Hardie board and batten installation, while rewarding, involves working with sharp tools and at heights, demanding rigorous adherence to safety protocols. Neglecting these precautions can lead to serious injury. This section details essential safety measures to ensure a safe and successful installation.
Safe practices should be prioritized throughout the entire installation process, from initial planning to final cleanup. This includes careful handling of materials, appropriate use of tools, and consistent awareness of potential hazards.
Personal Protective Equipment (PPE) Usage
Proper use of personal protective equipment is paramount. Eye protection, such as safety glasses or goggles, is crucial to prevent debris from causing eye injuries. These should be worn at all times during cutting, sawing, and nailing operations. Similarly, work gloves provide protection against cuts and splinters from the Hardie board and sharp tools. Sturdy, closed-toe shoes are essential to prevent foot injuries from dropped objects or sharp materials. A dust mask is recommended to minimize inhalation of harmful particles generated during cutting and sanding.
Safe Handling of Tools and Materials
Hardie board sheets can be heavy and unwieldy. Always lift with your legs, keeping your back straight to avoid strains and injuries. Use appropriate lifting techniques and consider using a helper for larger sheets. Sharp tools, such as utility knives, saws, and drills, should be handled with extreme care. Keep tools sharp to minimize effort and risk of slips. Store tools securely when not in use to prevent accidents.
Working at Heights and Fall Protection
When working at heights, such as on ladders or scaffolding, fall protection is non-negotiable. Always use a properly secured ladder that extends at least three feet above the working platform. Ensure the ladder is placed on a stable, level surface. Consider using a safety harness and lanyard when working at significant heights. Never overreach while on a ladder; descend and reposition the ladder if necessary. If scaffolding is used, ensure it is properly erected and inspected before use. Follow all manufacturer’s instructions and local safety regulations.
Visual Examples
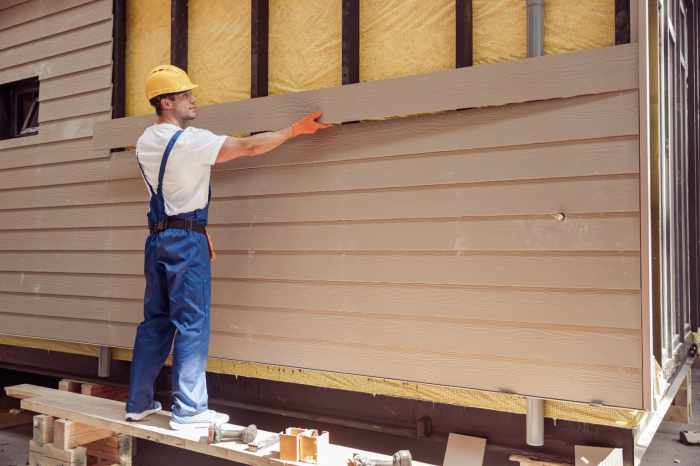
The aesthetic possibilities of Hardie board and batten siding are vast, allowing for diverse styles to complement various architectural designs and personal preferences. The choice of panel size, batten width, and color significantly impacts the overall look. Below are three distinct styles showcasing the versatility of this cladding material.
Traditional Farmhouse Style
This style evokes a sense of rustic charm and timeless elegance. It typically features wider Hardie planks, often ranging from 8 to 12 inches in width, creating a bold and substantial appearance. Battens, proportionally narrower than the planks (around 1-3 inches wide), are evenly spaced, usually 6 to 8 inches apart, creating a classic vertical rhythm. The color palette is generally muted, encompassing warm earth tones like creamy whites, soft grays, and muted blues. Imagine a home with large, slightly weathered-looking panels, accented by crisp white battens, conveying a sense of cozy, lived-in comfort. The overall effect is one of understated sophistication and enduring appeal. This style often incorporates additional architectural details such as dormers and large, welcoming porches.
Modern Minimalist Style
In contrast to the farmhouse style, the modern minimalist approach prioritizes clean lines and a streamlined aesthetic. This style utilizes narrower Hardie panels (4-6 inches wide) and thinner battens (½ to 1 inch wide), creating a subtle textural contrast without overwhelming the design. The spacing between battens is often tighter, resulting in a more uniform appearance. The color palette is typically restricted to a neutral, monochromatic scheme, with shades of gray, white, or black dominating. Visualize a home clad in sleek, charcoal-gray Hardie panels, punctuated by barely-there, nearly invisible white battens. The result is a sophisticated, contemporary look that emphasizes simplicity and geometric precision. The absence of excessive ornamentation underscores the clean, uncluttered design.
Rustic Style
The rustic style embraces a more natural, rugged aesthetic. This style often employs wider Hardie planks, similar to the farmhouse style (8-12 inches), but with a more pronounced emphasis on texture and variation. Battens, while still relatively narrow (2-4 inches), might be irregularly spaced or of varying widths to enhance the sense of organic, handcrafted charm. The color palette leans towards deeper, richer tones, such as deep browns, weathered grays, or even dark greens, to reflect the natural aging process of wood. Picture a home with deeply textured, dark brown Hardie panels, with wider, unevenly spaced battens, creating a feeling of natural, aged beauty. The overall effect is warm, inviting, and speaks to a connection with nature and traditional craftsmanship. This style often incorporates natural stone or wood accents to further enhance the rustic ambiance.
Mastering Hardie board and batten installation transforms your home’s exterior, adding both curb appeal and lasting protection. By following the steps Artikeld in this guide, you can confidently tackle this project, achieving a stunning result that reflects your personal style and enhances your home’s value. Remember, attention to detail, proper preparation, and safe working practices are key to success. With careful planning and execution, your Hardie board and batten siding will stand as a testament to your DIY skills for years to come.
Answers to Common Questions
What type of nails should I use for Hardie board?
Use galvanized or stainless steel nails specifically designed for fiber cement siding. These resist corrosion and provide superior holding power.
How do I clean Hardie board after installation?
A simple wash with water and a soft brush is usually sufficient. For tougher stains, use a mild detergent solution. Avoid abrasive cleaners.
Can I paint Hardie board immediately after installation?
Allow the Hardie board to fully cure (usually a few weeks) before painting to ensure proper adhesion and prevent peeling.
What is the best way to cut Hardie board?
Use a circular saw with a carbide-tipped blade designed for cutting fiber cement. Always wear appropriate safety gear, including a dust mask.
How often should I inspect my Hardie board siding?
Conduct a thorough inspection at least once a year, checking for damage, loose fasteners, or signs of deterioration.
