Power washing vinyl siding might seem straightforward, but mastering the technique ensures a sparkling clean exterior without causing damage. This guide delves into the intricacies of cleaning vinyl siding, from understanding its composition and susceptibility to dirt to employing the correct pressure washing techniques and choosing the right cleaning solutions. We’ll explore various pressure settings, safe practices, and solutions for stubborn stains, equipping you with the knowledge to achieve professional-level results. Proper cleaning not only enhances curb appeal but also protects your investment by preventing long-term damage. Let’s dive in!
This comprehensive guide covers everything from preparing your workspace and selecting the appropriate nozzle to understanding the different types of dirt and stains that affect vinyl siding and how to remove them effectively. We’ll also cover essential safety precautions and maintenance tips to keep your vinyl siding looking its best for years to come. Whether you’re a homeowner tackling a DIY project or a professional cleaner looking to refine your techniques, this guide provides valuable insights and practical advice.
Understanding Vinyl Siding and its Cleaning Needs
Vinyl siding, a popular exterior cladding choice for its durability and low maintenance, is actually quite susceptible to accumulating dirt and grime over time. Understanding its composition and the types of soiling it encounters is crucial for effective cleaning and preserving its longevity. This knowledge allows homeowners to make informed decisions about maintaining their home’s curb appeal and protecting their investment.
Vinyl siding is primarily composed of polyvinyl chloride (PVC), a plastic polymer known for its weather resistance. However, its smooth surface, while resistant to water damage, acts as a magnet for airborne pollutants, mildew, and other debris. The porous nature of some vinyl siding types, although minimal, can also allow for the absorption of certain stains, making thorough cleaning essential. The color pigments within the vinyl itself are also vulnerable to fading and discoloration from prolonged exposure to UV radiation from sunlight.
Types of Dirt and Stains Affecting Vinyl Siding
The accumulation of dirt and stains on vinyl siding is a gradual process influenced by several factors, including geographical location, proximity to trees or other vegetation, and the frequency of rainfall. Different types of soiling require different cleaning approaches for optimal results. Ignoring these varied types can lead to ineffective cleaning and potential damage to the siding.
- Algae and Mildew: These are common culprits, particularly in humid climates or areas with limited sunlight. They appear as dark streaks or patches, often thriving in shaded areas of the siding.
- Dirt and Dust: Airborne particles, including dust, pollen, and soot, gradually accumulate on the siding’s surface, creating a dull, grimy appearance.
- Insect Droppings: Bird droppings and other insect excrement can leave unsightly stains that are difficult to remove if left untreated for extended periods.
- Water Stains: Mineral deposits from hard water can leave streaks or spots, especially noticeable after rain or snow melt.
- Rust Stains: These are often caused by metal objects or fasteners that come into contact with the siding.
Potential Long-Term Damage from Neglecting Cleaning
Neglecting regular cleaning of vinyl siding can lead to a range of problems that extend beyond aesthetic concerns. The buildup of dirt, mildew, and other contaminants can not only detract from the home’s appearance but also compromise the structural integrity of the siding itself over time. The cumulative effect of these issues can result in significant and costly repairs.
Prolonged exposure to algae and mildew can cause discoloration and even damage the vinyl’s surface, reducing its lifespan. Persistent dirt and grime can trap moisture against the siding, promoting the growth of mold and mildew, potentially leading to rot and structural damage underneath. Furthermore, the degradation of the vinyl’s surface due to UV radiation and environmental factors is accelerated by the presence of accumulated dirt, further reducing the siding’s protective qualities and overall longevity. For instance, a house in a coastal region, exposed to salt spray and harsh sunlight, will require more frequent cleaning to mitigate the accelerated deterioration of the vinyl siding. Ignoring this could lead to premature failure and necessitate costly replacement far sooner than anticipated.
Power Washing Techniques for Vinyl Siding
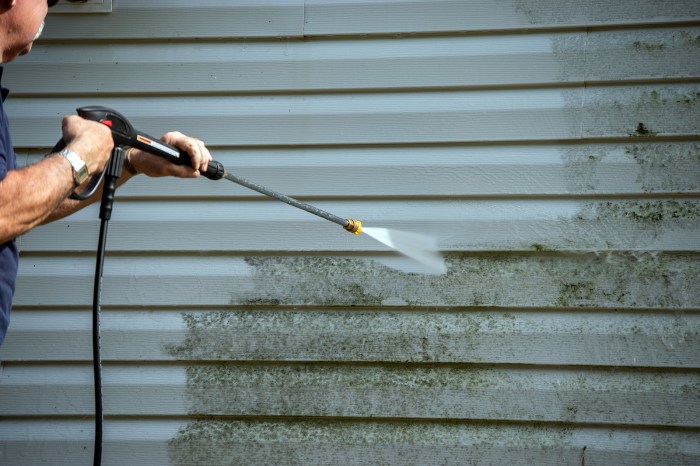
Power washing vinyl siding can dramatically improve its appearance, removing dirt, grime, and mildew. However, improper techniques can lead to damage. Understanding the appropriate pressure, nozzle type, and movement is crucial for achieving a clean surface without harming the siding. This section details the best practices for power washing vinyl siding safely and effectively.
Choosing the Right Nozzle Tip
Selecting the appropriate nozzle tip is paramount to successful vinyl siding cleaning. Different nozzle tips produce varying spray patterns and pressure intensities. Using an incorrect nozzle can easily damage the siding, causing gouges or even puncturing it. The most suitable nozzle for vinyl siding is typically a low-pressure, wide-angle nozzle, such as a 25° or 40° nozzle. These nozzles distribute the water pressure over a larger area, minimizing the risk of concentrated force damaging the siding. Higher-pressure nozzles, like 15° or even pencil jets, should be avoided, as they can easily penetrate the vinyl surface. A fan tip (40°) provides a broader spray pattern, enabling faster cleaning and reduced risk of damage compared to a narrower spray.
Preparing the Area Before Power Washing
Thorough preparation is essential for a safe and efficient power washing job. Begin by inspecting the siding for any loose or damaged sections. Repair or replace any damaged areas before power washing to prevent further damage. Next, remove any loose debris, such as leaves, twigs, or cobwebs, from the siding and surrounding areas. This prevents these items from being forced into the siding during the cleaning process. Finally, consider pre-treating areas with significant mildew or staining with a suitable cleaning solution to loosen the dirt and enhance cleaning effectiveness. Allow the pre-treatment to dwell for the recommended time before beginning the power washing process.
Maintaining a Safe Distance
Maintaining the correct distance between the nozzle and the siding is crucial to prevent damage. The optimal distance is generally between 12 and 24 inches. Keeping the nozzle too close can result in concentrated pressure that can damage the siding. Conversely, keeping it too far away reduces cleaning effectiveness. Consistent distance maintenance throughout the cleaning process ensures uniform cleaning and minimizes the risk of damage. Practice maintaining this distance on a small, inconspicuous area before proceeding with the entire surface.
Proper Nozzle Movement Technique
Moving the nozzle smoothly and systematically across the siding is crucial to avoid damage. Avoid lingering in one spot, which can cause excessive pressure buildup and potential damage. Use overlapping strokes to ensure complete coverage. Maintain a consistent speed and pressure, and always keep the nozzle moving. Moving the nozzle in a back-and-forth motion, slightly overlapping each pass, is generally recommended. Avoid a circular motion, which could lead to more concentrated pressure on a single point.
Pressure Settings and Their Effects on Vinyl Siding
| Pressure Setting (PSI) | Cleaning Effect | Risk of Damage | Recommended Use |
|---|---|---|---|
| 500-800 | Effective for removing light dirt and grime. | Low | General cleaning, light mildew removal. |
| 800-1200 | Effective for removing moderate dirt and grime, some mildew. | Moderate | Heavily soiled areas, stubborn stains (use caution). |
| 1200-1500+ | Aggressive cleaning, potentially removes heavy grime and mildew. | High | Not recommended for vinyl siding. Risk of damage is significant. |
| <100 (with soap) | Effective for light cleaning, primarily using the soap’s cleaning power. | Minimal | Ideal for regular maintenance, avoiding harsh pressure. |
Cleaning Solutions and Their Effectiveness
Choosing the right cleaning solution is crucial for effective vinyl siding cleaning without causing damage. The type of stain and the siding’s condition dictate the best approach. Using too harsh a cleaner can strip the siding’s protective layer, while a too-weak solution will be ineffective. This section details the effectiveness of various cleaning solutions and their appropriate applications.
Water Pressure and Plain Water
Plain water, when used with the correct pressure from a power washer, is often sufficient for removing loose dirt and grime. Low pressure is key to prevent damage. High-pressure water jets can cause damage to the vinyl, potentially cracking or warping the siding. For lightly soiled siding, a simple rinse with a garden hose might suffice. For more stubborn dirt, a low-pressure power washer, set to a wide fan pattern, will offer better results. The goal is to remove surface debris before moving to stronger cleaning agents if needed. Avoid prolonged contact with high pressure to any one area.
Detergents for General Cleaning
Mild detergents, such as a solution of dish soap and water, are effective for removing general dirt and grime. A typical ratio is 1/4 cup of dish soap per gallon of water. Always test a small, inconspicuous area first to ensure the detergent doesn’t discolor or damage the siding. Apply the solution with a soft-bristled brush or a low-pressure sprayer, ensuring even coverage. Thoroughly rinse the siding afterward with clean water to prevent soap residue buildup, which can attract more dirt. Using a garden sprayer for application allows for even distribution and reduces the chance of over-applying detergent in any one area.
Specialized Vinyl Siding Cleaners
Commercially available vinyl siding cleaners are formulated to remove specific stains without harming the vinyl. These cleaners often contain bleach or other chemicals to combat mildew and algae. Always follow the manufacturer’s instructions regarding mixing ratios and application methods. Many of these products are available in concentrated form, requiring dilution with water. It’s crucial to thoroughly rinse the siding after applying any specialized cleaner to prevent residue buildup and potential damage. Choose a cleaner specifically designed for vinyl siding to avoid unintended consequences.
Cleaning Solutions for Specific Stains
Different stains require different cleaning approaches. For mildew and algae, a solution of bleach and water (typically a 1:10 ratio of bleach to water) is often effective. Always wear protective gear, including gloves, eye protection, and a respirator when working with bleach. For tougher stains, consider using a specialized vinyl siding cleaner containing biocides. For stubborn stains that resist these methods, professional cleaning might be necessary. Persistent mold or mildew can indicate underlying issues requiring attention beyond cleaning. Dirt and grime can usually be removed with a mild detergent solution and a thorough rinse.
Pre- and Post-Cleaning Procedures
Proper preparation and post-cleaning procedures are crucial for achieving optimal results and preventing damage to your vinyl siding and surrounding areas. Failing to adequately prepare can lead to unintended consequences, while neglecting post-cleaning steps can leave your siding vulnerable. These steps ensure a thorough and safe cleaning process.
Preparing the area before power washing is essential to protect your property and achieve a clean finish without causing damage. Careful planning minimizes the risk of collateral damage and ensures the effectiveness of the cleaning process. Rinsing and drying the siding correctly is equally important to prevent water damage and mineral buildup. Finally, a thorough post-cleaning inspection identifies any potential problems that require attention.
Pre-Cleaning Checklist, Power washing vinyl siding
A comprehensive pre-cleaning checklist safeguards your landscaping, windows, and other exterior features from potential damage during the power washing process. This proactive approach helps maintain the overall aesthetic appeal of your home and prevents costly repairs.
- Protect landscaping: Cover delicate plants and shrubs with tarps or plastic sheeting. Use heavy-duty tarps secured with weights or stakes to prevent them from blowing away during the cleaning process. Consider moving potted plants to a safe location.
- Shield windows and doors: Cover windows and doors with plastic sheeting and painter’s tape to protect them from water damage and potential scratches from stray debris. Ensure a tight seal to prevent water from seeping through.
- Clear the area: Remove any loose debris, such as leaves, twigs, or trash, from the siding and surrounding areas. This prevents the debris from being blown around by the power washer and potentially damaging the siding or other surfaces.
- Inspect for loose siding: Check for any loose or damaged siding panels before beginning. Repairing these issues beforehand prevents further damage during the cleaning process. Loose siding can be easily dislodged by the force of the power washer.
- Protect outdoor furniture: Move any outdoor furniture, such as patio chairs or tables, away from the cleaning area to prevent damage from water and cleaning solutions. If this is not possible, cover them with heavy-duty plastic sheeting.
Post-Cleaning Rinsing and Drying
Thorough rinsing and drying after cleaning is crucial to prevent water spots, mineral deposits, and potential damage to the vinyl siding. This step ensures a clean, even finish and protects the longevity of your siding.
- Final rinse: After cleaning, use a low-pressure setting on your power washer to rinse away all traces of cleaning solution. Ensure all surfaces are thoroughly rinsed to prevent streaking or residue buildup.
- Allow to air dry: Allow the siding to air dry completely. Avoid using high-pressure fans or cloths, as these can scratch the vinyl. Natural air drying minimizes the risk of water spots or streaks.
- Inspect for remaining dirt: Once dry, inspect the siding for any remaining dirt or debris. If any areas need further cleaning, carefully address them with a low-pressure rinse or a soft brush.
Post-Cleaning Inspection
A post-cleaning inspection is essential to identify any unforeseen damage that may have occurred during the cleaning process. This allows for prompt repairs and prevents further deterioration of the vinyl siding.
Carefully examine the siding for any signs of damage, including cracks, chips, or loose panels. Pay close attention to areas where the siding may have been subjected to higher pressure. Note the location and severity of any damage found. Any significant damage should be repaired by a professional.
Inspect for any remaining mildew or algae. If these are present, it may indicate the need for a more aggressive cleaning approach in the future or a more powerful cleaning solution. If the mildew or algae reappear quickly, consider addressing the underlying moisture issues causing the problem.
Addressing Specific Cleaning Challenges
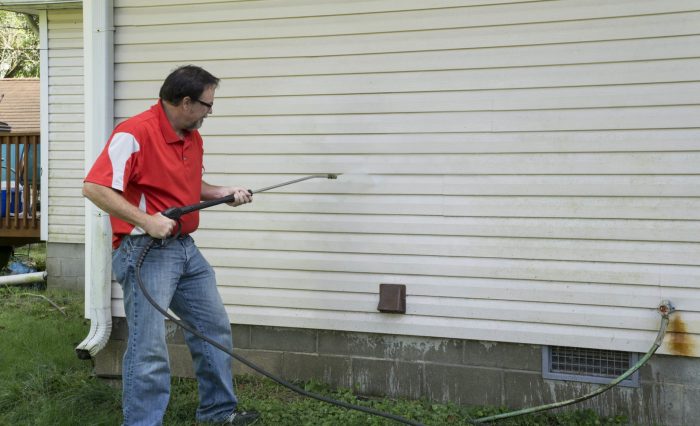
Cleaning vinyl siding effectively often requires addressing specific challenges beyond general cleaning. Stubborn stains, hard-to-reach areas, and delicate or damaged sections demand tailored approaches to ensure a thorough and safe clean. Understanding these challenges and employing the right techniques is crucial for achieving optimal results and preserving the longevity of your siding.
Removing Stubborn Stains
Mildew and mold are common culprits behind stubborn stains on vinyl siding. These organic growths thrive in damp environments and can leave unsightly discoloration. Effective removal typically involves a two-pronged approach: cleaning and prevention. First, a solution of chlorine bleach and water (typically a 1:10 ratio, but always check product instructions) can be applied to affected areas using a pump sprayer or soft-bristled brush. Allow the solution to dwell for 10-15 minutes before rinsing thoroughly with clean water. For severe mold infestations, a commercial vinyl siding cleaner specifically formulated to kill mold and mildew may be necessary. After cleaning, ensuring proper ventilation and addressing any underlying moisture issues, such as leaky gutters or poor drainage, is crucial to prevent future mold growth. Regular cleaning, especially in damp climates, helps to prevent the build-up of mold and mildew before it becomes a major problem.
Cleaning Hard-to-Reach Areas
Corners, edges, and areas under eaves often accumulate dirt and debris that are difficult to reach with standard power washing equipment. For these areas, a combination of techniques is usually most effective. A long-handled brush with soft bristles can be used to scrub away loose dirt and grime. A lower-pressure nozzle attachment on your power washer, or even a garden hose with a spray nozzle, can be used to rinse away the loosened debris. For particularly stubborn build-up, a detail brush or even a toothbrush can be used to gently scrub the affected areas. Always exercise caution to avoid damaging the siding in these delicate areas. Consider using a ladder for safe access to higher areas, ensuring a stable and secure footing.
Cleaning Delicate or Damaged Areas
Damaged or delicate areas of vinyl siding require a gentler approach than the rest of the surface. High-pressure power washing can exacerbate existing damage, leading to further cracking or peeling. For these areas, it’s best to avoid power washing altogether. Instead, use a soft-bristled brush and a mild cleaning solution (such as a mixture of dish soap and water) to gently clean the surface. Focus on removing loose dirt and debris without applying excessive pressure. If the siding is severely damaged, it may be necessary to repair or replace the affected sections before attempting any cleaning. Inspect the siding thoroughly before beginning the cleaning process to identify areas requiring special attention. Remember, prevention is key: regular, gentle cleaning can help to prevent damage from accumulating over time.
Safety Precautions during Power Washing
Power washing vinyl siding, while effective, presents inherent risks if safety procedures aren’t meticulously followed. Ignoring safety precautions can lead to serious injuries, property damage, and even legal repercussions. This section details essential safety equipment and procedures to ensure a safe and successful cleaning process.
Proper safety practices are paramount when operating a pressure washer. The high-pressure water stream can cause significant harm if not handled correctly. Understanding your equipment and adhering to safety guidelines are crucial for preventing accidents and protecting yourself and your property.
Essential Safety Equipment
Prioritizing personal safety requires the use of appropriate protective gear. Neglecting this step can lead to avoidable injuries. The following equipment is essential for safe power washing:
- Eye Protection: Safety glasses or goggles are mandatory to protect your eyes from flying debris and high-pressure water spray. Consider a face shield for added protection.
- Hearing Protection: Pressure washers can generate significant noise. Ear plugs or ear muffs are necessary to prevent hearing damage from prolonged exposure.
- Gloves: Heavy-duty work gloves protect your hands from cuts, abrasions, and chemical exposure from cleaning solutions.
- Closed-Toe Shoes: Sturdy, closed-toe shoes provide protection from dropped objects and potential slips or falls.
- Long Sleeves and Pants: Protective clothing shields your skin from the high-pressure water stream and potential splashes of cleaning solutions.
- Water-Resistant Clothing: This protects against water saturation, particularly during prolonged use or in wet conditions.
Proper Safety Procedures
Beyond equipment, proper procedures are critical for preventing injuries. Careful planning and execution minimize risks significantly. The following procedures are crucial:
- Inspect the Area: Before starting, carefully inspect the area for any obstacles, fragile items, or potential hazards that could be damaged or cause injury. Remove any loose objects or debris.
- Test the Pressure Washer: Before directing the spray at the siding, test the pressure washer on a less visible area to ensure the pressure and nozzle are appropriate. This helps avoid unintended damage.
- Maintain a Safe Distance: Keep a safe distance from the surface being cleaned to avoid accidental injury from the high-pressure water stream. Never point the nozzle at yourself or others.
- Use a Steady Grip: Maintain a firm grip on the pressure washer wand to prevent it from slipping or kicking back unexpectedly. Avoid jerky movements.
- Control the Water Flow: Start with a lower pressure setting and gradually increase it as needed. Avoid using excessive pressure, which can damage the vinyl siding.
- Work in Sections: Clean the siding in manageable sections, overlapping slightly to ensure complete coverage. This prevents missing spots and allows for better control.
- Avoid Overspray: Be mindful of overspray, which can damage nearby plants or landscaping. Consider using protective covers or shields.
Understanding Pressure Washer Capabilities and Limitations
Knowing your pressure washer’s specifications is vital for safe and effective cleaning. Operating the machine outside its recommended parameters can lead to damage or injury. Consult your owner’s manual for details on pressure, flow rate, and nozzle types. Using the wrong nozzle or exceeding the maximum pressure can damage the vinyl siding, causing cracks or warping. For instance, a pressure washer rated for 2000 PSI should not be used on delicate surfaces; a lower pressure setting, perhaps 1000-1500 PSI, might be more appropriate for vinyl siding to avoid damage. Similarly, using the wrong nozzle type, like a concentrated rotary nozzle, could easily puncture or gouge the vinyl. Using a wider, fan-shaped nozzle is generally recommended for vinyl siding cleaning.
Maintaining Clean Vinyl Siding
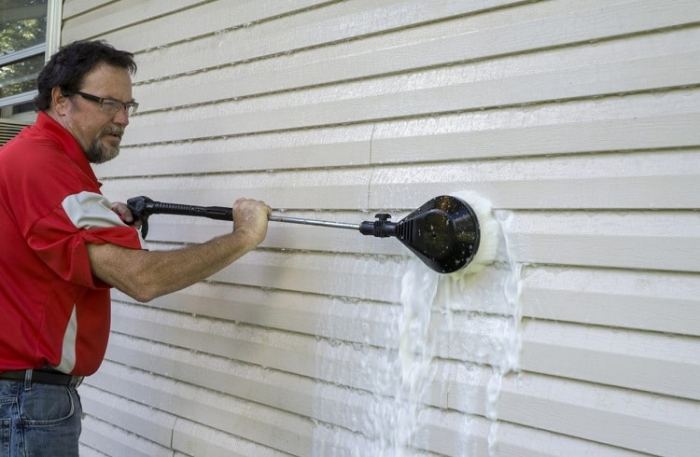
Keeping your vinyl siding clean extends its lifespan and maintains its aesthetic appeal. Regular maintenance, even between professional power washes, significantly reduces the accumulation of dirt, grime, and other debris that can damage the siding over time. This proactive approach helps prevent the need for more intensive cleaning and potential repairs.
Preventative measures significantly reduce the frequency and intensity of necessary cleaning. By addressing minor dirt and debris regularly, you can prevent these from building up into larger, more difficult-to-remove stains. This approach ultimately saves time, money, and effort in the long run.
Preventative Measures for Vinyl Siding
Regularly removing loose debris, such as leaves, twigs, and cobwebs, prevents them from becoming embedded in the siding. A simple broom or leaf blower can be effective for this task. Additionally, promptly addressing any spills or stains with a gentle cleaning solution prevents them from setting. For example, bird droppings should be cleaned immediately to avoid staining. Finally, trimming overhanging branches keeps them from constantly shedding debris onto the siding.
Cleaning Schedule Based on Environmental Factors and Siding Condition
The optimal cleaning schedule depends on several factors. Homes in areas with heavy tree cover or proximity to busy roads will require more frequent cleaning than those in less polluted environments. Similarly, siding exposed to direct sunlight will show more dirt accumulation than shaded areas. A general guideline is to perform a thorough cleaning (with soap and water or a low-pressure rinse) every 6 to 12 months, adjusting the frequency based on these environmental factors. If you notice significant staining or discoloration, more frequent cleaning may be necessary. For example, a home near a busy highway might need cleaning every 3-6 months, while a home in a rural, wooded area might only need cleaning annually.
Benefits of Regular Cleaning and Impact on Siding Longevity
Regular cleaning prevents the buildup of dirt and grime that can degrade the vinyl material over time. This buildup can trap moisture, leading to mold and mildew growth, which can damage the siding and even affect the structural integrity of the house. Regular cleaning also removes pollutants, preventing them from causing discoloration and fading. By removing these elements, you protect the color and appearance of your siding, extending its life and enhancing your home’s curb appeal. A clean home also presents a more positive first impression to guests and potential buyers, contributing to increased property value. In essence, regular maintenance is an investment in protecting your home’s exterior and increasing its overall value.
Successfully power washing vinyl siding requires a careful balance of power and precision. By following the steps Artikeld in this guide—from preparing the surface and selecting the correct cleaning solutions to mastering the pressure washing technique and taking necessary safety precautions—you can achieve a clean and vibrant exterior without risking damage to your siding. Remember, regular maintenance is key to preserving the beauty and longevity of your home’s exterior. With the right knowledge and approach, you can confidently tackle this task and enjoy the rewards of a beautifully clean home.
FAQ Corner: Power Washing Vinyl Siding
Can I use bleach to clean vinyl siding?
While bleach can kill mold and mildew, it can also damage vinyl siding over time. Use a diluted bleach solution only as a last resort and always test it on an inconspicuous area first.
How often should I power wash my vinyl siding?
The frequency depends on your climate and how dirty your siding gets. Generally, once or twice a year is sufficient, but more frequent cleaning may be necessary in areas with heavy pollen, mildew, or pollution.
What’s the best time of year to power wash vinyl siding?
Spring or fall are ideal times. Avoid extreme heat or cold, as these can affect both the cleaning process and the siding itself.
What should I do if I accidentally damage my vinyl siding during power washing?
Contact a professional siding repair company for assessment and repair. Attempting to fix damaged siding yourself could worsen the problem.
